How to use www.beforeitsgone.co
Here are some tips on how to use the editing tools on this site to help make your stories richer.
Titles & Location
Each story needs a title and location. Only the city name and borough are needed. There’s no reason to add a full address—unless you want to.
Adding Photos
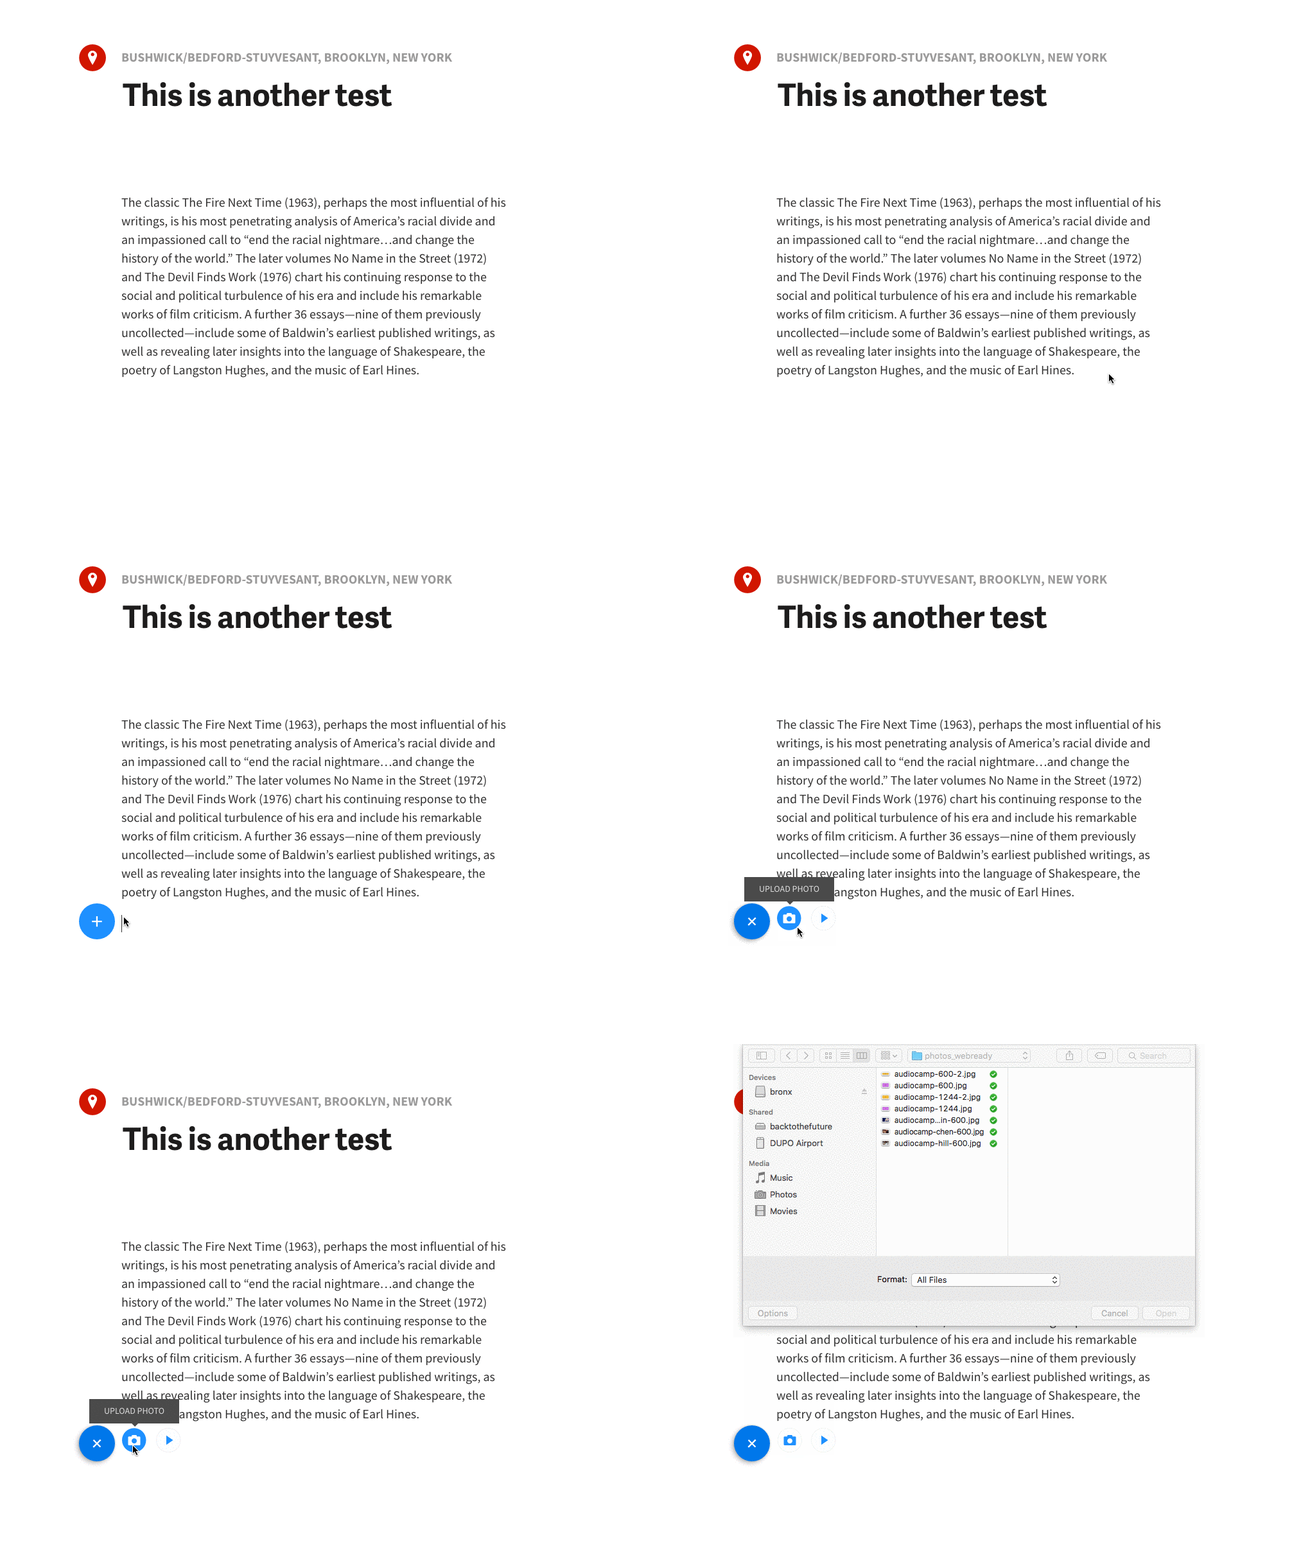
You can add photos to add more depth to your story.
To add a photo click on ‘insert button’. The insert button appears each time your on a new line.
Adding Video & Social Media Embeds
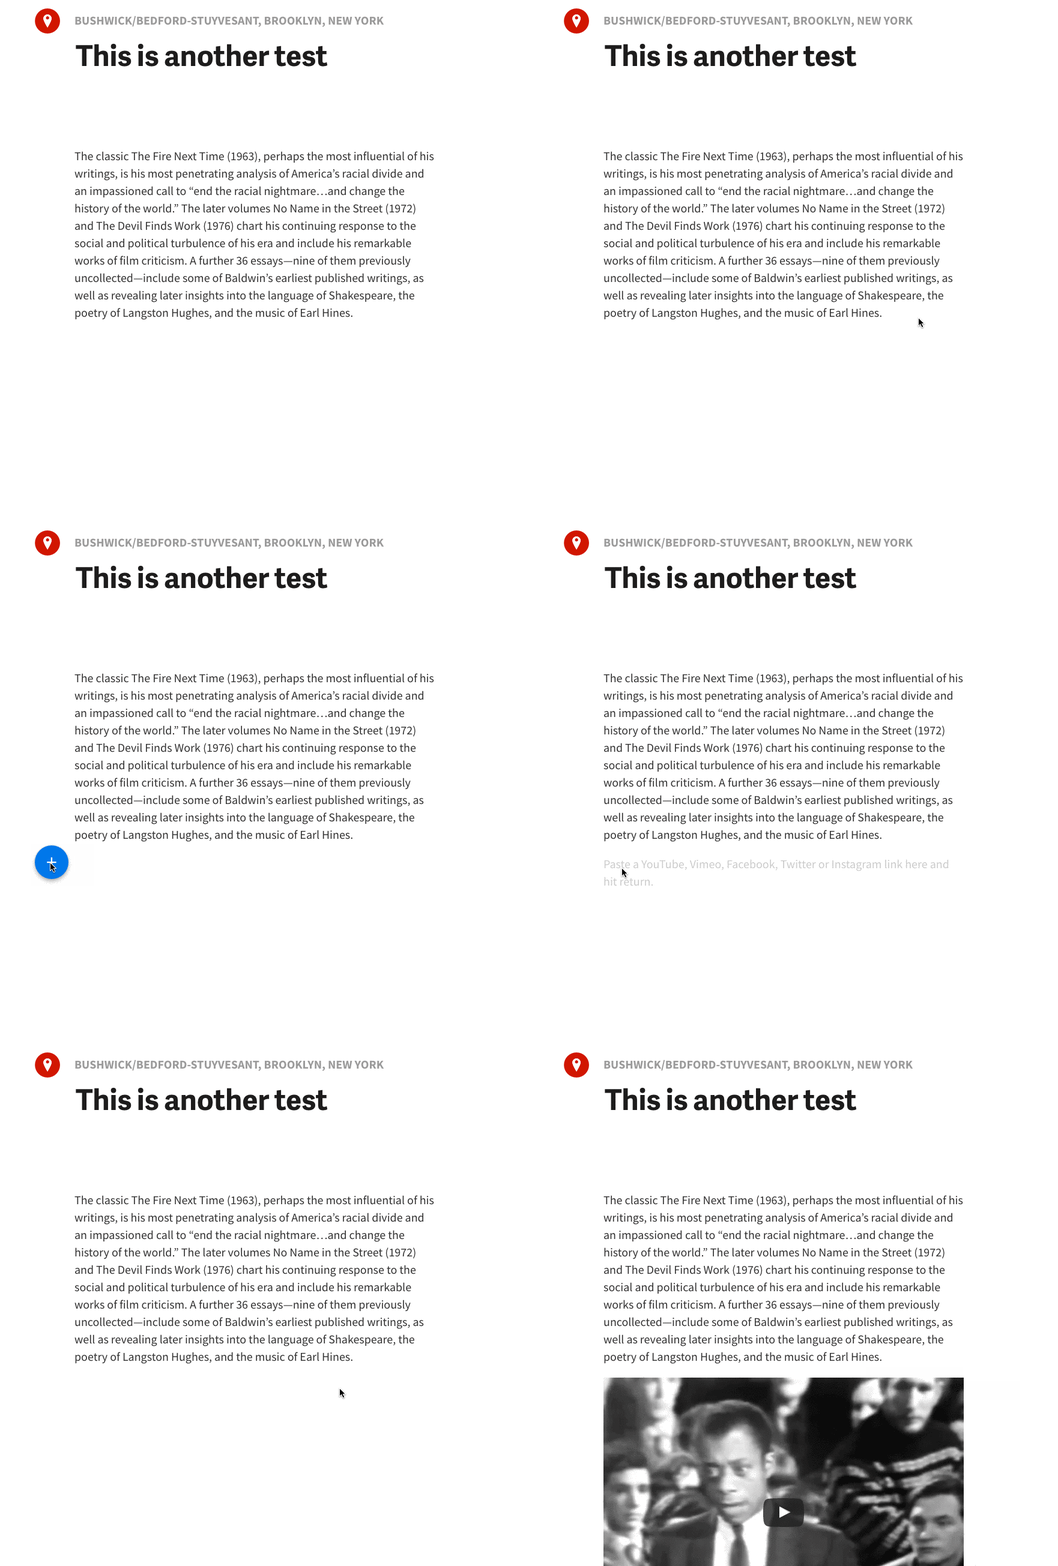
To add video embeds click on the insert button and click on the video icon (play button). Paste the social media embed link onto the page then press enter.
Styling Text (edit menu)
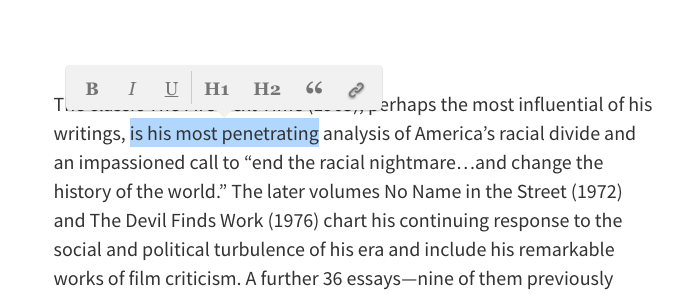
When highlighting text a contextual menu will appear above the selected text. From the menu you can bold, italicize, underline, and/or add a link (see below).
Adding Links
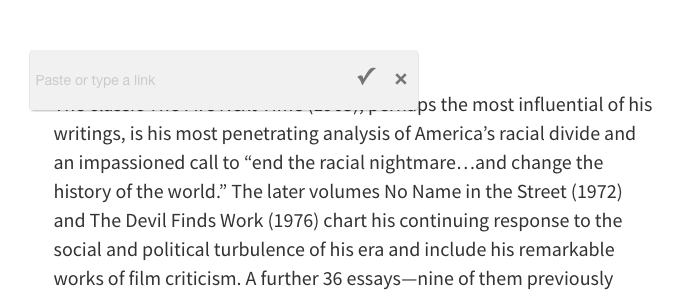
After bringing up the contextual menu, click on the link icon (the chain) and enter the URL in the field. Click enter or press your return key for the change to take effect. The text will turn blue indicating that it is a link.
If you made a mistake, select the text to bring up the contextual menu and repeat the steps outlined above.
Publishing and Editing
The publish buttons become clickable only after adding location, title, and some text to your story. If the fields are not complete they will remain inactive and display as grey.
Drafts
All unpublished stories are kept under the draft section accessible through your account page.
You can start from where you left off or delete your draft completely.
Auto Save
We auto save your writing so you never have to worry about losing any of you stories.
Updating Your Avatar
If your signed in through Facebook then we'll use the same profile pic you used in face book.
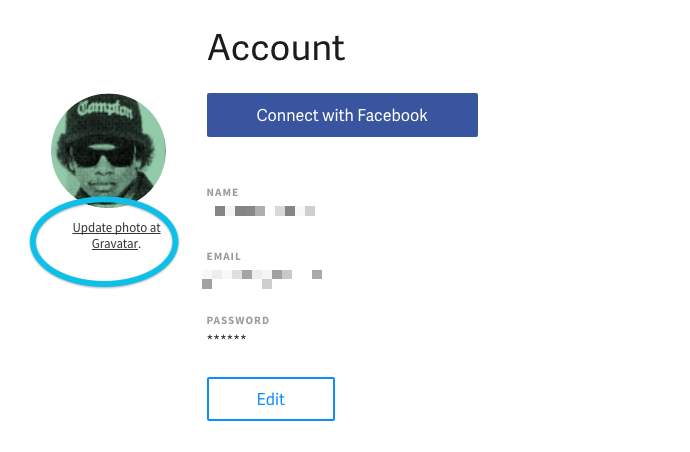
We use gravatar for those who sign in using their personal email account. Sign up for a gravatar account and follow the instructions on their site to attach a profile pic to your email account.